Drone telemetry is the information an aircraft sends back about its flight: where it is, how it’s moving, which mode it’s in and how its systems are doing. The altitude, speed and battery readings on a ground station are familiar examples.
At first, that can look like a lot of numbers competing for your attention. You probably don’t need all of them all the time. You do need to know what the useful ones mean, where they came from and whether they’re still arriving.
That last part is easy to overlook. A number can sit neatly on the screen long after the situation it described has changed. Understanding telemetry starts with the readings, then follows them all the way from the aircraft to the person looking at them.
How the information reaches you
The aircraft gathers measurements and produces estimates onboard. Selected information is sent over a connection, and the ground station turns the messages it receives into instruments, map positions and status indicators.
On many ArduPilot and PX4 setups, those messages use MAVLink, a protocol that gives the aircraft and software a common way to exchange information. The protocol defines the messages. A radio, cable or network connection carries them. Our guide to how MAVLink connects a drone to a ground control station follows the conversation from its first hello to a command reply.
People sometimes use “telemetry” to mean the whole connection, including commands sent back to the aircraft. That’s understandable when the same equipment handles both directions. It helps to keep the jobs separate in your head: the aircraft reports what it is doing, and the ground station can ask it to do something.
There isn’t one universal telemetry setup. ArduPilot’s telemetry overview includes dedicated radios and systems that combine telemetry with RC control. A direct radio connection can work without the internet; a connection using a cellular service has different dependencies. Two screens showing similar readings may be receiving them through very different equipment.
Getting familiar with the readings
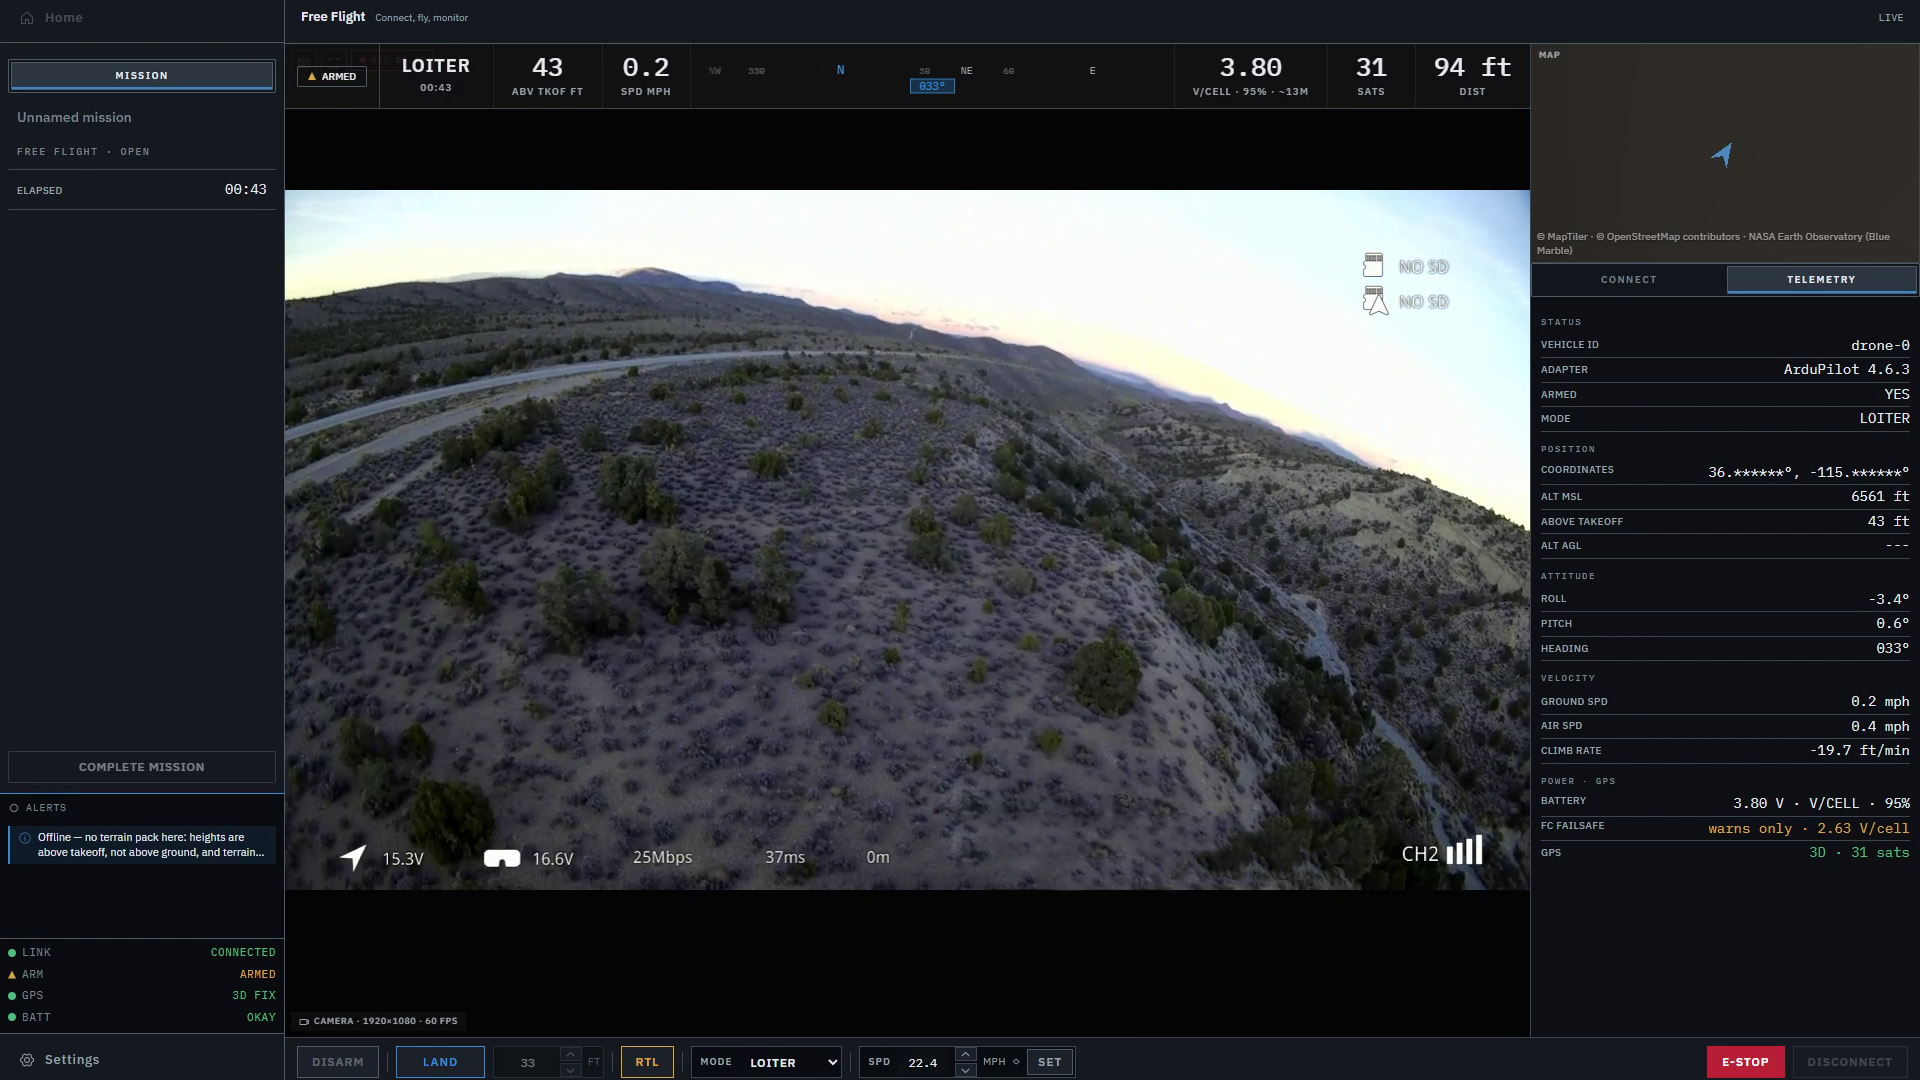
The exact values available depend on the aircraft, its sensors, the messages being sent and the software displaying them. These are some of the groups you’ll commonly encounter:
| Reading | What it helps you follow |
|---|---|
| Position and altitude | Where the aircraft reports being, including the reference used for its height |
| Groundspeed and vertical speed | Movement across the ground and climbing or descending |
| Attitude and heading | The aircraft’s tilt and the direction it is facing |
| Flight mode and armed state | The reported control mode and whether the aircraft is armed |
| Battery information | Reported voltage, current or remaining charge, where available |
| GPS and link status | Information about positioning and the connection carrying the messages |
MAVLink’s flight-instrument message definitions distinguish readings such as groundspeed, airspeed, heading, altitude and climb rate. QGroundControl’s toolbar guide shows how mode, battery, GPS and link information can appear in a ground station. These are examples of the wider category; every application won’t show the same things.
The labels do quite a bit of work. Groundspeed describes movement over the ground; airspeed relates to movement through the air. Heading tells you where the nose points, which can differ from the direction the aircraft is traveling. An altitude needs a reference such as sea level or home before its number makes sense.
It’s worth getting those distinctions straight before getting attached to a particular number. A big, clear “80” is still missing something if you don’t know whether it’s meters, feet, or a value the aircraft is trying to reach.
A connected aircraft can still show old information
Telemetry arrives as separate messages. Position might update several times while a battery reading stays the same. That can be normal: different information can be sent at different rates. MAVLink supports setting message rates, with the available connection capacity affecting how much data can be carried.
The connection indicator answers another question. MAVLink uses heartbeat messages to help systems discover each other and infer whether they’re still connected. Receiving a heartbeat doesn’t establish that every other reading on the screen has just been refreshed.
That’s how a ground station can remain connected while a particular value falls behind. Depending on the software, the old value may stay visible, be marked as stale or disappear. Knowing how your ground station handles that is part of knowing how to read it.
Here’s a made-up example. An aircraft is moving in a straight line at 8 meters per second. If the displayed position is two seconds behind the aircraft, it could be about 16 meters behind along that path. The arithmetic is simple; noticing that the marker is old may be the harder part.
There’s also a difference between a reading’s age and its accuracy. A fresh position can still have uncertainty. An old position might have described the aircraft well when it was measured. Ideally, the display helps you understand both.
Even a “last received” timer needs interpretation. It measures time since the message arrived; any delay before arrival is separate. Readings drawn next to a video feed also shouldn’t be assumed to describe the exact moment shown in the image. Their timing needs to be accounted for.
Following what happens after a command
Imagine asking an aircraft to change altitude. The new target appears on the screen, and the aircraft reports that it accepted the command. It’s tempting to treat that as the job done and move your attention elsewhere.
The telemetry is where you follow what happens next. What mode is reported? Does vertical speed show a climb or descent? Is the reported altitude moving toward the target?
MAVLink’s command protocol makes a useful distinction here: an accepted command means the flight stack will attempt to act on it. Acceptance alone doesn’t establish that the requested action has finished. The reply to a command and the subsequent flight readings give you different pieces of the answer.
Our article on why drone pilots need more than a dot on a map uses a hypothetical flight toward rising ground to explore this. The map, terrain and aircraft response are easier to understand together than as isolated values.
You don’t need to stare at every instrument. The useful habit is to follow the readings that answer the question in front of you. After an altitude change, that question is whether the aircraft is doing what you expected. A highlighted button can’t answer it by itself.
When a connection drops
“We lost the link” can describe several different problems. The ground station may have stopped receiving telemetry, the pilot’s RC connection may have failed, or the video may have frozen. The equipment can share connections, but those functions are still worth naming separately.
If telemetry stops arriving, the last map position tells you where the aircraft was last reported. It doesn’t establish that the aircraft has stopped there, returned home or lost its RC connection too.
What the aircraft does depends on its configuration and flight state. ArduCopter documents ground station failsafe behavior separately from RC radio failsafe behavior. The response is configurable; losing contact doesn’t have one guaranteed outcome across every setup.
This is also why a working video feed can’t confirm that telemetry is current. You may still have a picture while the readings have stopped updating, or the reverse. It helps to describe the specific symptom: “position updates stopped” gives you more to work with than “the drone disconnected.”
What remains after landing
If the ground station records telemetry, those messages can help you revisit a flight. You can look back at the reported mode, altitude and other values instead of trying to remember everything you saw at the time.
There are limits to that record. A ground station can’t record aircraft messages it never received. A gap in its telemetry log may therefore leave part of the flight missing from that account.
The autopilot may also record data onboard. ArduPilot’s introduction to flight logs distinguishes those onboard logs from telemetry logs recorded by the ground station. They are different records, and the available detail depends on what each system was configured to record.
For review, start by identifying which record you have and where it has gaps. A smooth line drawn between two recorded positions doesn’t add measurements in between them. Our guide to drone flight logs looks more closely at the different records and how to read them.
Making the information easier to use
When we’re working on Markhor, this is the part that keeps coming up: making the flight easier to follow while there is already plenty going on. The current workspace brings aircraft controls, telemetry and a 3D terrain view together.
We want the person at the screen to spend less time hunting for a reading and more time understanding what changed. That matters whether they’re following a routine flight or supporting people working on the ground. Markhor is in active development and is not yet available outside Lechuza.
A telemetry display becomes much more useful once you can read past the number: what it describes, how current it is and how it fits with the other information you have. You don’t need to memorize every field to start doing that.